Set Up Email Autoforwarding
Below are the steps to enable Ebuy integration with Capture2Proposal for your entire company. The process takes about a minute to add GSA credentials to the Admin Console, and <5 minutes to enable the required CC rule in O365 (O365 Administrator permissions are required).
Create Server-Side Forward Rule GSA - O365
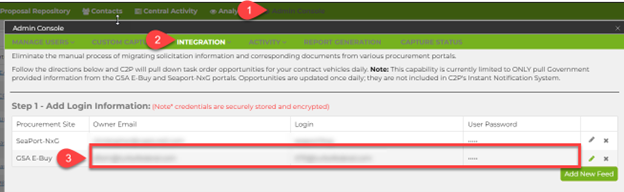
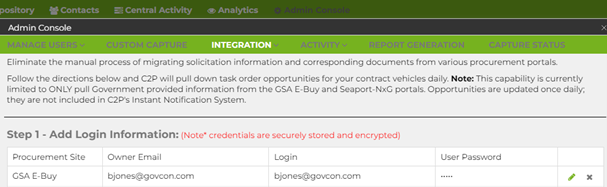
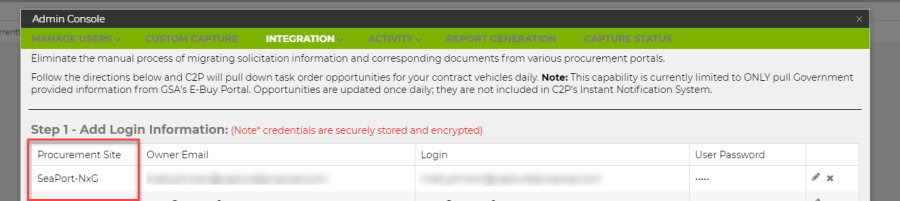
Step 1: Enter GSA Credentials in the C2P Admin Console
- Enter your Ebuy credentials under the Admin Console à Integration à Procurement tab and click the disk icon to save after entering.
- Owner Email = the email address forwarding the C2P code (usually the same as the Login unless your Login is an email distribution group)
- Login = the Ebuy login (FAS ID)
- Password = Ebuy login password (all credentials are stored encrypted in Keyvault and cannot be accessed by C2P engineering team)
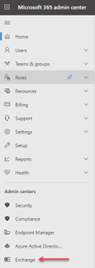
Step 2: Set up the CC rule on the mailbox in O365
The following steps explain how to create a server-side email rule for the integration to import your GSA Ebuy opportunities each night. Complete these steps after entering your GSA FAS ID login information under the Admin Console à Integration à Procurement tab.
***The GSA FAS ID being used must receive the “one-time verification” code via email. If you don’t currently receive your MFA code via email, contact the GSA Help Desk (877-495-4849) to switch to email which is required for this integration.***
- Open the Exchange Admin Center from the O365 Admin Center (click “Show all” to find)
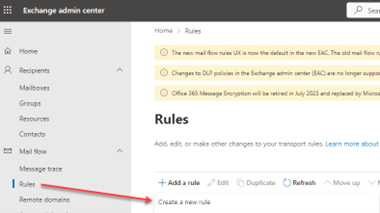
- Under Mail Flow àRules Click the "+ Add a Rule Button à Create a new rule
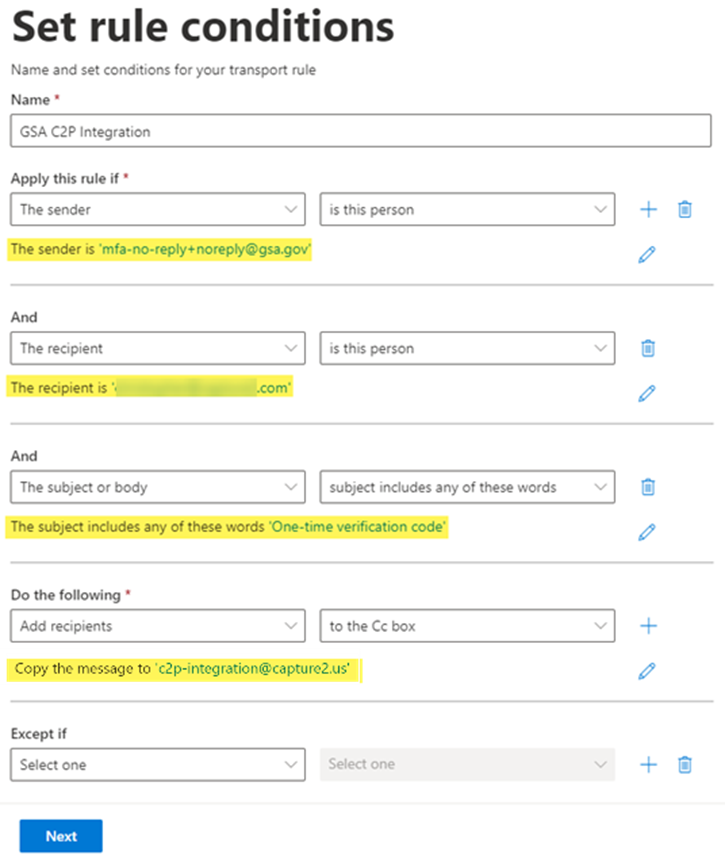
- In the new rule window:
- Give the rule a name/description
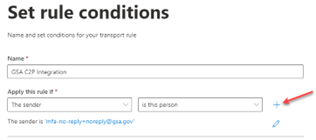
- Select à "Apply this rule if..." à "The sender is"
- Enter the mfa-no-reply+noreply@gsa.gov email address à Save

- Click the blue + icon to add a new condition
- Add the new condition parameters:
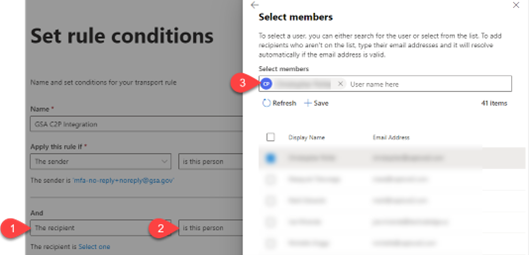
- Select à "The recipient"
- Select à "is this person"
- Select the mailbox/email address used for Ebuy integration with C2P à Save
- Add the next condition parameters:
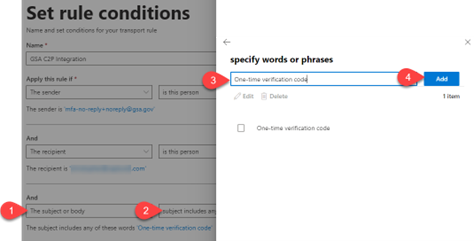
Select à “The subject or body”
Select à “subject includes any of these words”
Enter “One-time verification code” in the pop-up window à Add à Save
- In the “Do the following…” drop-down menu:
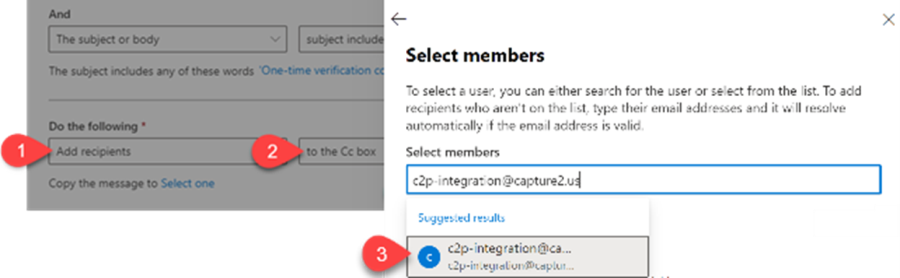
- Select à "Add recipients"
- Select à "to the Cc box"
- Enter c2p-integration@capture2.us in the “Select members” pop-up window à Save
- Verify your rule matches the following conditions before clicking Next à Next à Finish
NOTE – All licensed BD Managers/Admins will receive an email notification any time the integration fails. The most common reasons are an incorrect or expired Ebuy password, or the email rule is not setup correctly.
***Remember to update the C2P Admin Console whenever Ebuy requires you to change your password!***
Forward Emails to Capture2Proposal for GSA E-Buy Integration
The following steps explain how to create a server-side email forwarding rule for Capture2Proposal to download your Seaport-NxG opportunities each night. Complete these steps after entering your Seaport NxG login information under the Admin Console à Procurement Integration. If you are an O365 Administrator, you may use the instructions for forwarding emails, substituting in the SeaPort email as needed.
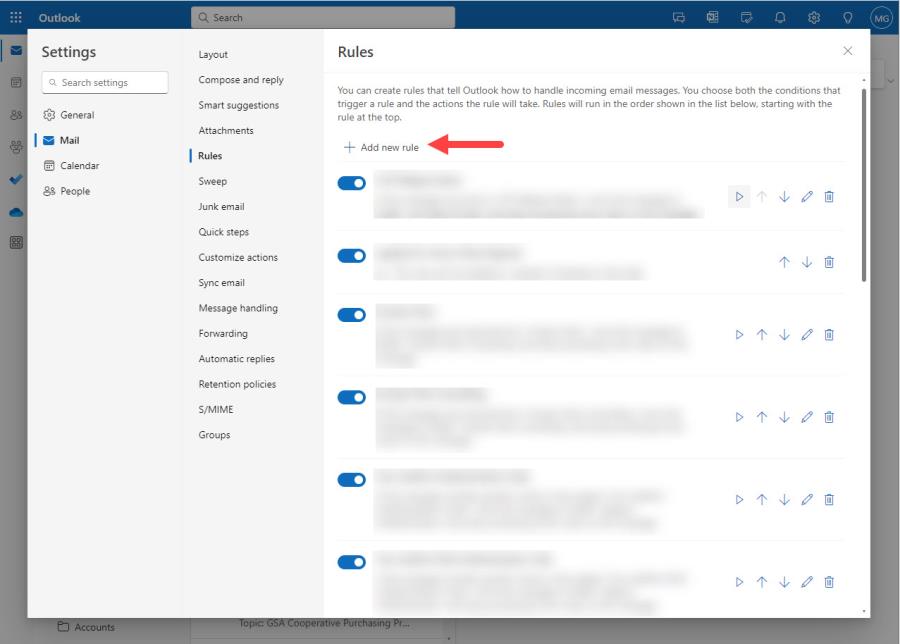
- Open the Settings from O365 Admin Center
- Under Mail à Rules, click the “+ Add a Rule” button à Add a new rule
- In the new rule window
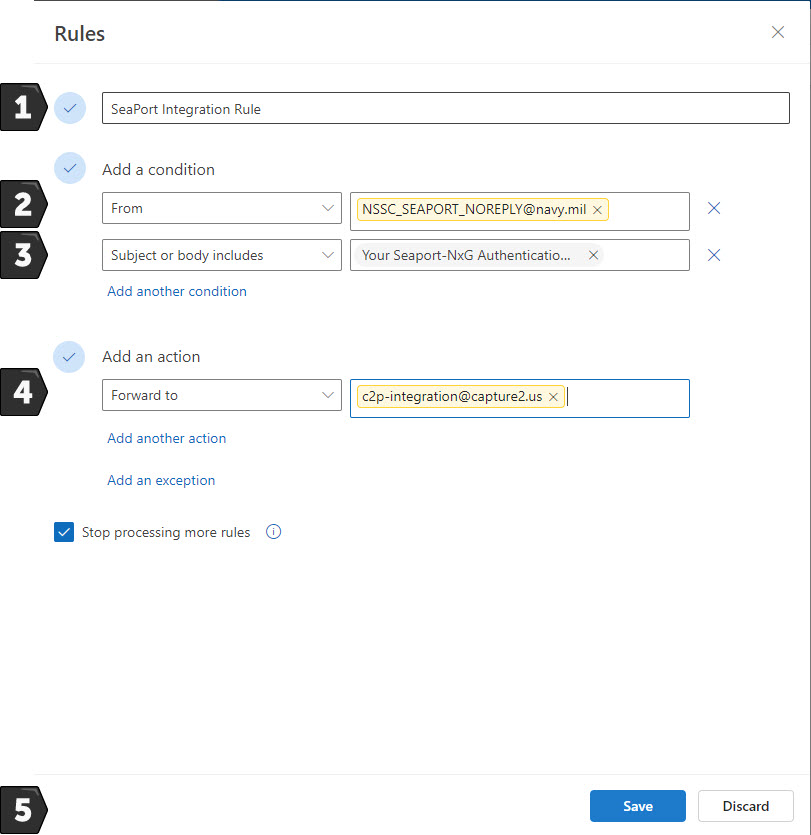
- Give the rule a Name, e.g., "SeaPort Integration Rule"
- Select Add a Condition à From NSSC_SEAPORT_NOREPLY@navy.mil
- Select Add another condition à Subject includes "Your Seaport-NxG Authentication Code"
- Add an Action àForward To c2p-integration@capture2.us
- Save the Rule
Note – If your company has multiple people logging into Seaport NxG, an extra “The recipient is…” condition will be required to ensure you’re forwarding the appropriate code to c2p-integration.
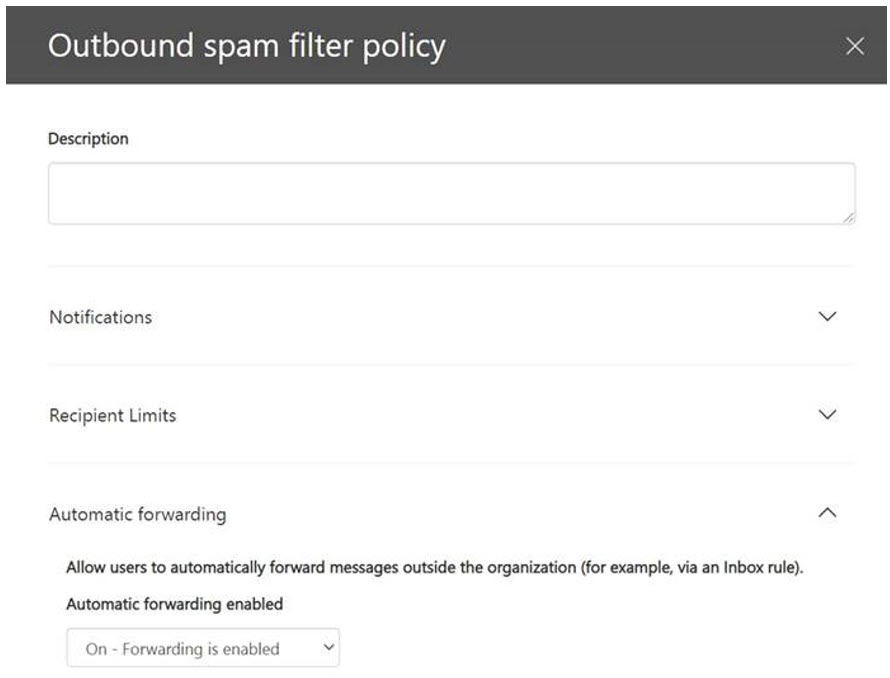
- Enable automatic external email forwarding (Microsoft blocked this by default starting in October 2020)
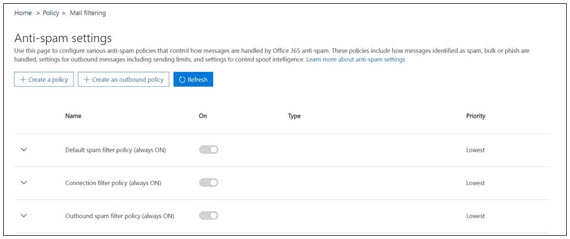
- Log in to your Office 365 Security & Compliance portal for Microsoft 365 and choose Threat management à
Anti-spam or head directly to the Anti-spam settings page here: https://protection.office.com/antispam
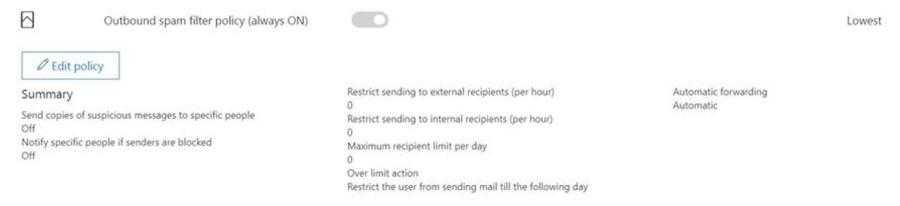
- Click the down arrow next to Outbound spam filter policy (always ON) and click the Edit policy button.
- Click the down arrow next to Automatic forwarding, then choose On - Forwarding is enabled from the dropdown. Click Save.
- Log in to your Office 365 Security & Compliance portal for Microsoft 365 and choose Threat management à
Anti-spam or head directly to the Anti-spam settings page here: https://protection.office.com/antispam
- Please be sure to email support@capture2.com to inform our Customer Success Team that the forwarding rule has been applied (the c2p-integration mailbox is not monitored); we will confirm emails are being received within 2 business days.