Report Generation (MS Reports)
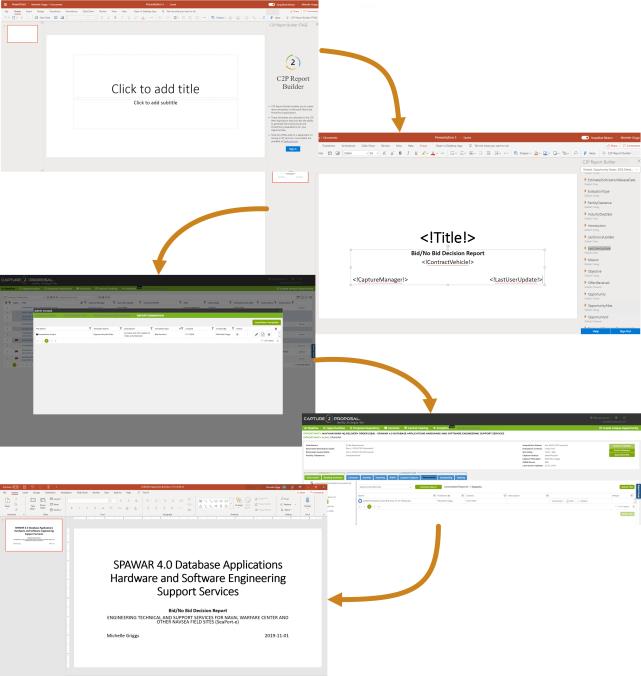
The report generation tool is a powerful feature for building template-based documents for all of your opportunities. Use this tool to create report templates, then automatically fill them with the proper content for any opportunity in your company pipeline to create custom reports with the minimum amount of time and effort. You no longer need to look for the data each time you create a report for a new opportunity, because C2P is pulling all the relevant information into the reports in the right place for you.
- Creating templates is done directly through Microsoft Word or PowerPoint. The C2P Report Generator add-in runs in Word and PowerPoint 2016 on Windows 10 or through a web browser (office.com).
- Business Development Managers and Admins load these templates using the Admin Console, and choose which templates should be active.
- In each opportunity, a "Generated Reports" folder will be visible under the Documents tab, and users with appropriate permissions can generate new reports for the opportunity and/or read the generated reports for the opp.
The first step is to install the add-in while you are in Word or PowerPoint to have access to create the templates.
- Open a blank document or an existing document that you'd like to use as a template.

- In the gray ribbon bar at the top, choose the option "Insert."
- Select the box with the Red Icon about halfway across the page that says "Get Add-ins."

- Search the Store for "Capture2Proposal" or "C2P Report Builder."
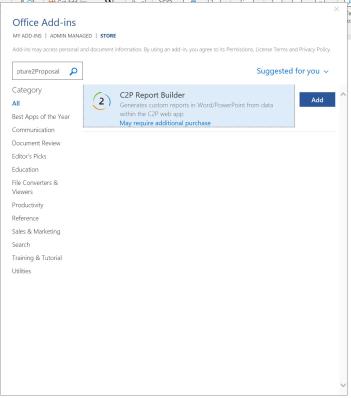
- Select the Add-in and hit the "Add" button.
- Select the box with the Red Icon about halfway across the page that says "Get Add-ins."
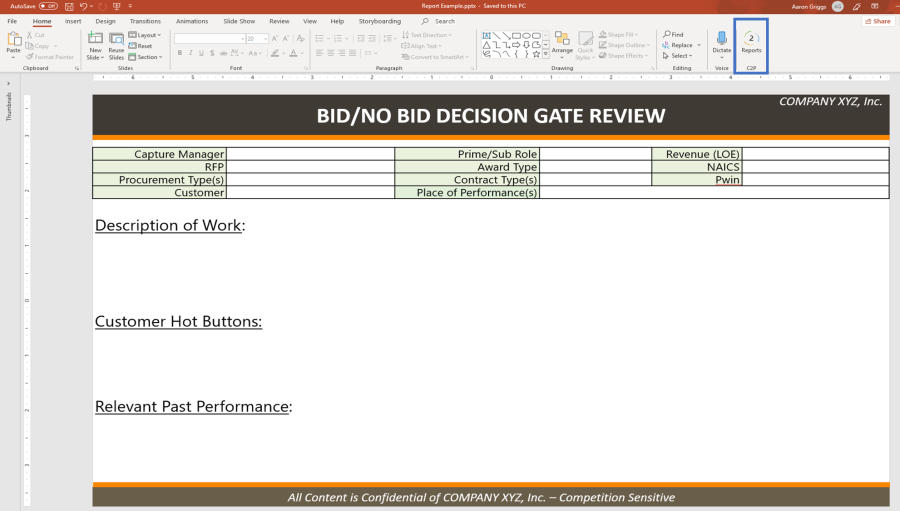
- Go back to the home tab. The C2P Report Builder Add-In will be visible on the far left of your header bar.
- Click on the Report Builder and a sidebar will open allowing you to sign into your C2P account.

- Click on the Report Builder and a sidebar will open allowing you to sign into your C2P account.
That's it! You have successfully loaded the Add-In! Sign in and all the fields you can choose to add to the report will be visible in the sidebar.
The add-in is accessed from the home tab of the Microsoft Office program. Select your program, then follow these steps to create the template.
- Click the C2P Reports icon in the home tab.
- You will now see the C2P Reports Sidebar.
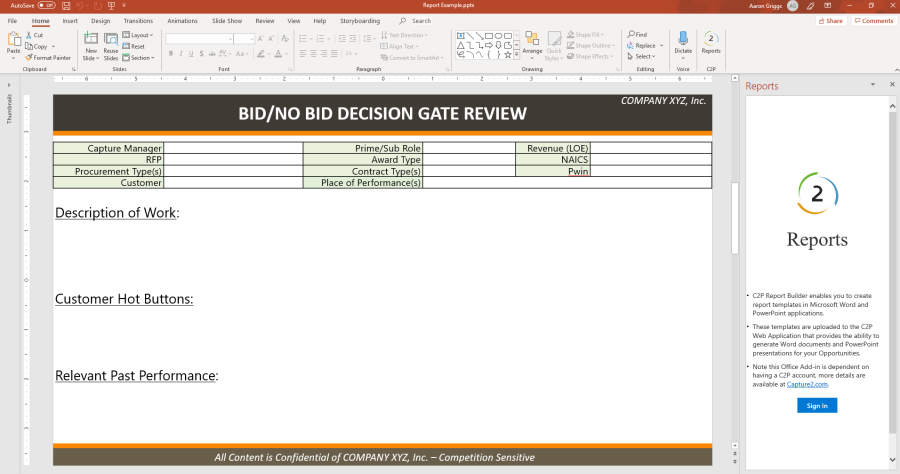
- Click the 'Sign In' button, then log in using your C2P account.
- You will now see the C2P Reports Sidebar.
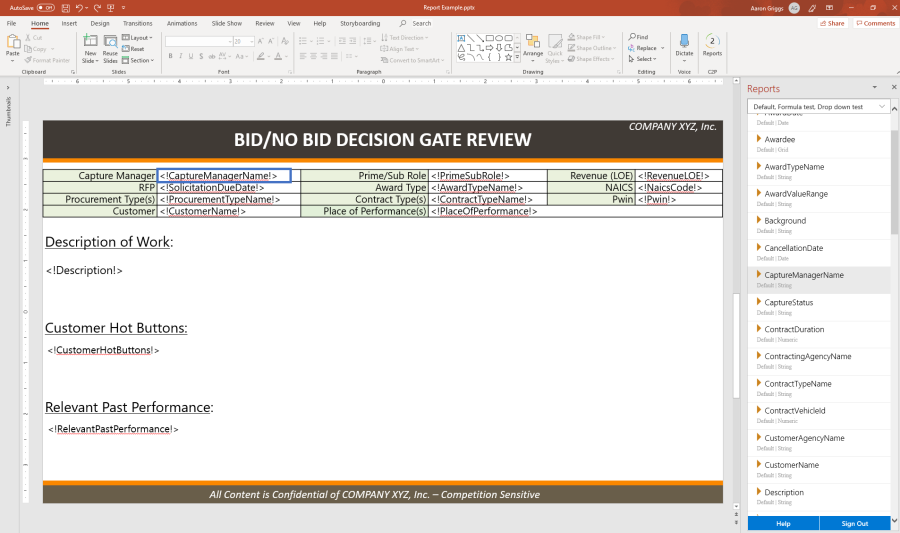
- The sidebar now lists all of the Pipeline fields from your C2P account that can be inserted into your template.
- Click on a field in the sidebar to add to the report.
Note in PowerPoint on Office.com, the fields populate only if the cursor is in a text box. Clicking on a field in the sidebar when no text box is present results in an empty text box being created that can then be populated with a second click of the field. Grid fields should not be added into formatted tables in Microsoft documents.
- Click on a field in the sidebar to add to the report.
- Save the template to load into C2P.
Once you have created the template in either Word or PowerPoint, you need to load it into your C2P account. You must have a manager-level account to complete this step.
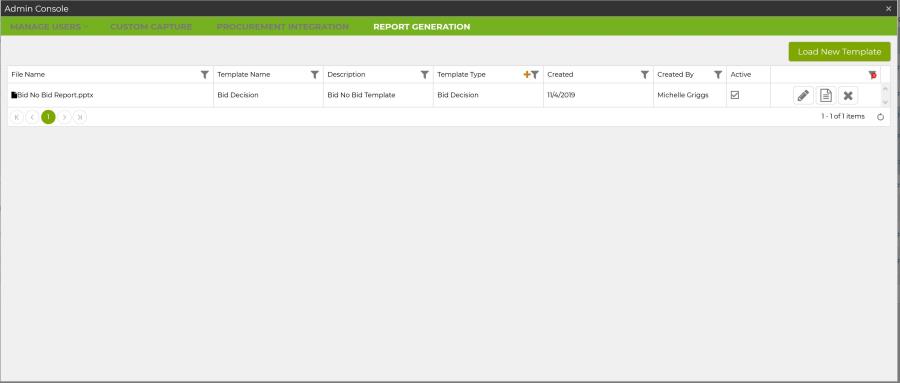
- Click to open the Admin Console and click on the section in the green header named "Report Generation."
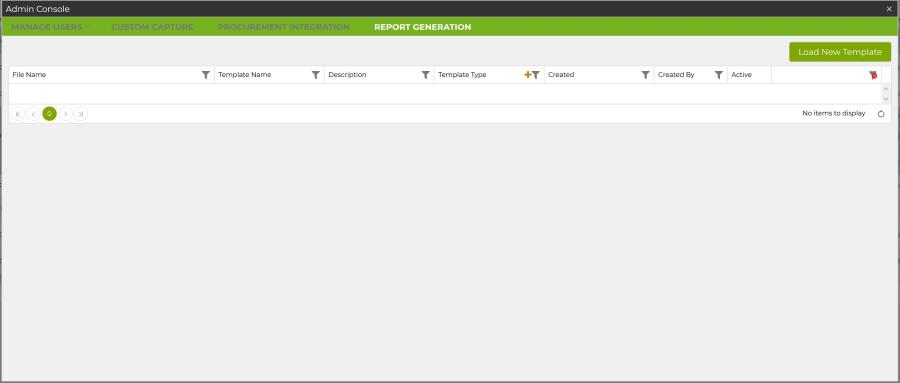
- Click "Load New Template."
- Select the file and it will load into a new row with the ability to edit the name, description, and template type.
- The name is what will be visible in the opportunity folder when a user creates a new templated report, so make sure it is something that users will recognize.
- The description is for use on this page only. You can leave it blank, but if you have created a new version of an existing report, you may want to note the changes here.
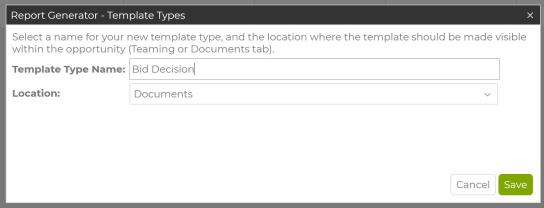
- The template type identifies what type of report you are creating.
- Only one report for any template type can be active at any time. This is to enforce uniformity for a type of report, although you can create more template types so that reports can be created for each of your specific needs.
- Click the orange plus button to create additional template types; an Opportunity Report type is provided in all accounts as a default.
- If you attempt to load a file that is not .docx or .pptx, or that does not contain any valid tags for C2P fields, you will receive an error message and your file will not load as a template.
- Fill in the fields and hit the Save icon (floppy disk).
- Click the check box to make the report active.
- This cannot be done until a report has been saved.
- If there already is an active report of this type, you will get a warning message and the option to replace the active report or cancel this action.
- Select the file and it will load into a new row with the ability to edit the name, description, and template type.
- If you need to edit any of the fields, click the pencil icon to edit.
- Click the report icon to download the template.
- This is an easy way to view and update an existing template.
- You will need to save any changes and upload the new version to make it active.
That's it! You have loaded the template, made it active, and now it can be used to fill in information on any opportunity in your company pipeline!
Each report template you create can be used to generate opportunity-specific reports from within your Capture2Proposal Account. The ability to generate reports is limited to licensed users, plus the Capture Manager and the Proposal Manager for the opportunity, regardless of their license status. Right-clicking the Reports folder will allow these users to view and adjust permissions for other users as needed.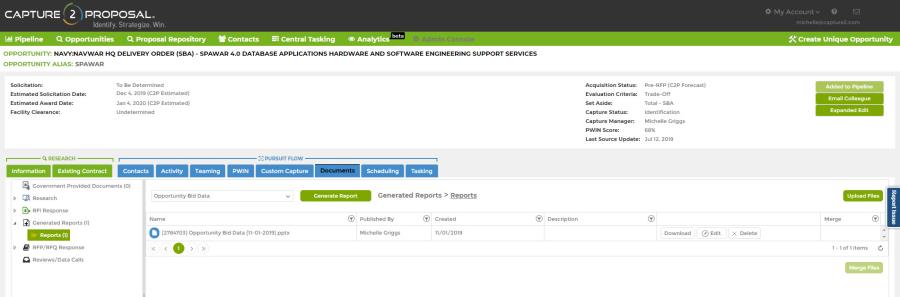
- In your Capture2Proposal account, open the opportunity for which you'd like to generate a report.
- Go to the Documents tab for the opportunity.
- Open the Generated Reports folder in the left sidebar.
- Select the folder for the template you want to use to create the report.
- Click "Generate New Report."
- The report will be created in the folder, and downloaded to your computer.
- Open the downloaded report to review.
- You may need to perform some edits for clarity as some fields, notable long text and grid fields, may need some resizing to fit properly in the report.
- Fields without data will be left empty in the report. This is particularly useful when multiple similar fields are included, so the end user can view the results and select the best option available; sometimes only one field of multiple similar fields (e.g. Mission, Scope) may have data.
The Description field in the report generator tool is our default description from our initial data source. In our opportunity view, it is replaced by more detailed information from opportunity documents whenever possible (Introduction, Background, etc). For this reason, using the description field in Report Generator may produce different results than you see in the opportunity.